Ok.. I’m so ecstatic.. a quick blog post must be written…
The Product manager of VMware Fusion, Michael Roy, had a classic “One More Thing” item in his VMworld presentation. The presentation was “What’s New with VMware Workstation and VMware Fusion”.
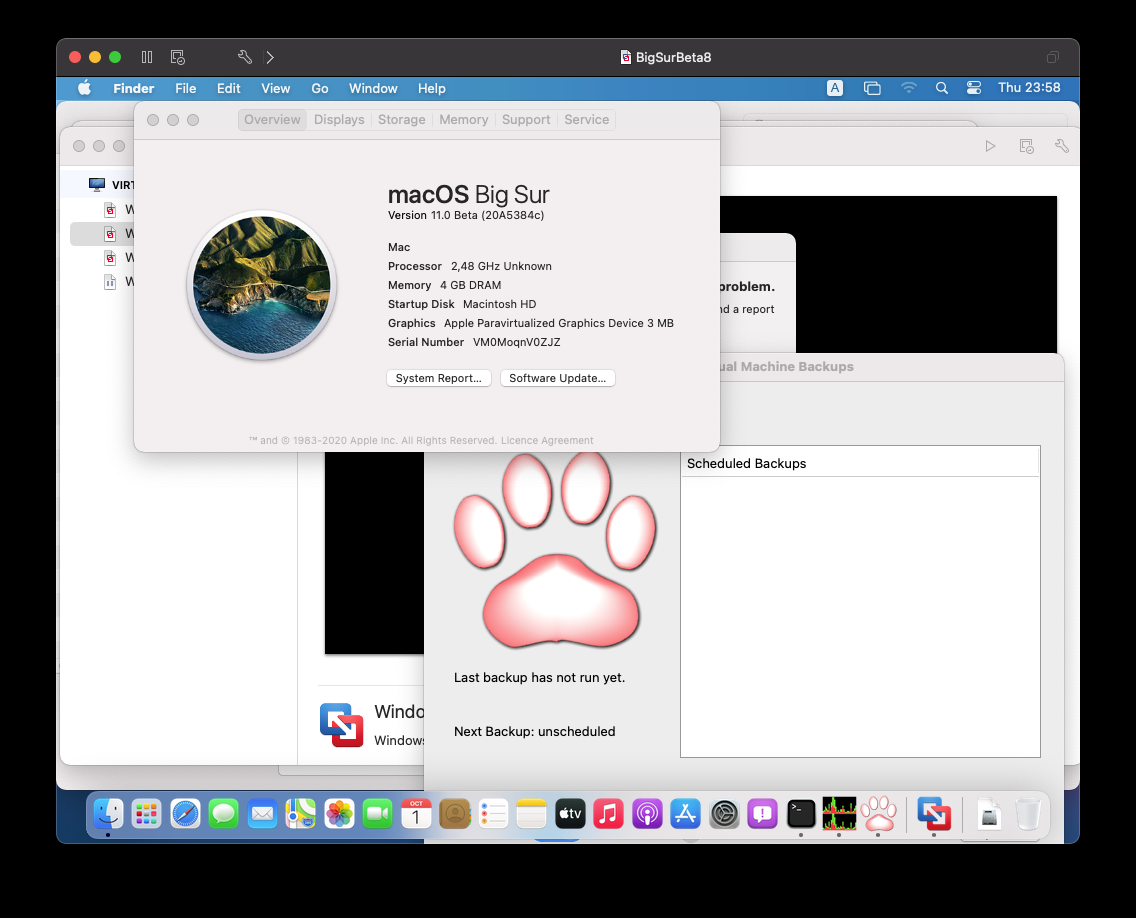
While running a Big Sur macOS guest, he showed “Metal Support” working without a hitch… Now we have been told for years that we cannot get 3D Acceleration in a macOS guest. Seeing this on the list of “things to come” was already pretty great. Something to look forward to. During that same presentation he also showed the .vmx settings in order to get that working. Once the feature lands…
Who wants to wait?
So of course, immediately after the presentation I had to try. No matter that it is only supposed to be working in a future version of VMware Fusion 12.0. After adding the .vmx settings from the presentation I got a “Invalid configuration” error (or something along those lines). OK, sad panda.
But … silly me did not look at the vmware.log file. Today I was poking Michael a bit on twitter and asking about how well Metal works on Big Sur beta 9 and that it is “so hard to wait” and he tells me “but you can try it yourself already”… ?
You can totally use it today actually, but AutoFit doesn't work (needs new tools that haven't shipped yet… future versions won't require Tools at all)
OMG.. that’s when I realized that I had missed a detail..
Ohh… I had not put the svga.present="FALSE" line and now I see what other precondition I missed (silly me)…
vmx| I005: AppleGPU: Apple GPU support is not available: requires macOS 11.
Looks like I will update that box to macOS 11 right now.
— Wil van Antwerpen #StandWithUkraine (@wilva) October 1, 2020
It’s all in the details
Also my host wasn’t running Big Sur yet (I had only run it in a VM) … so… next hour or so I was frantically busy installing Big Sur Beta 9 on my 2014 Mac Mini and YES… IT DOES WORK and it is SOOOO SMOOTH
This is the best thing since sliced bread.
THANK YOU VMware Fusion team!
In summary
This is not an officially released feature, treat it what it is: Experimental
Required: minimum of macOS Big Sur as host OS Required: minimum VMware Fusion 12.0 Guest OS support: minimum of macOS Big Sur as guest OS (earlier macOS versions are missing the GPU paravirtual kernel extension for this – AppleParavirtGPU.kext. Unless apple steps in here and releases that for earlier macOS versions, it likely isn’t coming to earlier guest OS’s)
You have to add the following lines to the .vmx file of your VM in order to test this: svga.present="FALSE" appleGPU0.present="TRUE" appleGPU0.screen0.width = "1680" appleGPU0.screen0.height = "1050"
To be honest I don’t even have the lines with width and height, but that’s how you can define that for now. It will only get better from here on once it is officially supported.
Update 2020/11/13: Another tip from Michael Roy (thanks Mike) is to update your VMware Tools to 11.2
Also, install VMware Tools 11.2 in your Big Sur VM with the paravirt GPU and you’ll have auto fit working nicely, no Fusion update required 🙂https://t.co/quB0bS4xvW
Update 2021/06/13: Beware that you cannot edit the .vmx file of an encrypted VM! If you want to test this on an encrypted VM you will have to remove the encrypted before trying to change the .vmx file. If you don’t’ do that, you will likely break your VM.
Now that you are here. Please check out our product “Vimalin“. It has been designed for making your life easier to get good backups of your VMs. We support VM’s running in VMware Fusion, VMware Workstation and VMware Player.
Thanks to the Android x86 project you can run Android as a VM in VMware Fusion. Getting this to work requires a few additional steps that are not exactly obvious. So I figured to write this post.
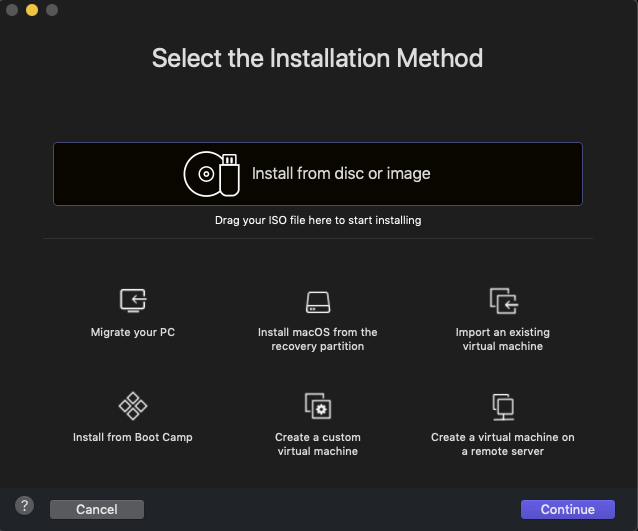
In VMware Fusion, from the menu select File -> New. You will get the following screen:
Drag your downloaded .iso file onto the designated area and press the Continue button.
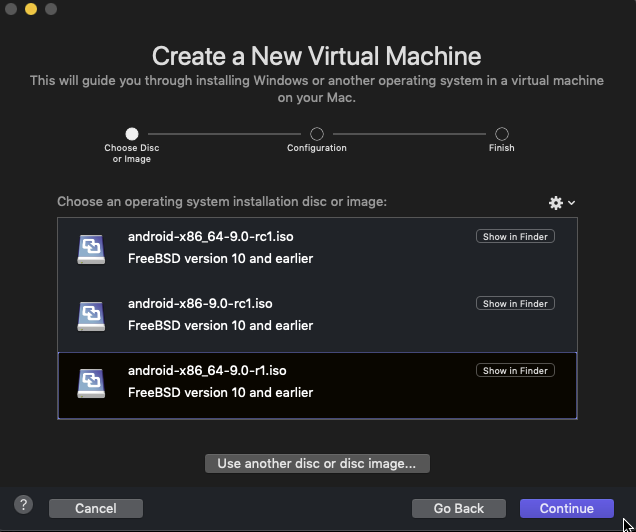
The create a new virtual machine wizard
As you can see I had installed android earlier. The “New VM” wizard comes with the .iso file you dragged onto it selected and it detected it as “FreeBSD 10 or earlier”. That guest OS type isn’t exactly correct, but it doesn’t matter for getting this to work. Select “Continue”.
Select “Legacy BIOS”, not UEFI
For the firmware option, it is recommended to stick to the “Legacy BIOS”. Click Continue again.
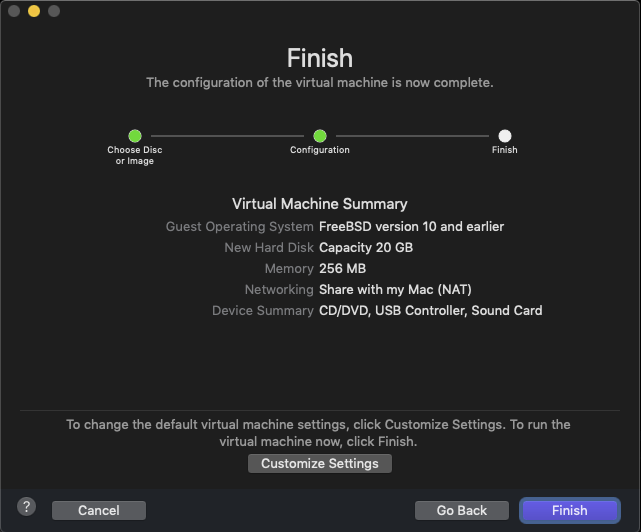
Finish Wizard
Customize Virtual Hardware
Here we click on “Customize Settings” and not “Finish” as the defaults need to be tweaked for the VM to run better. When you click “Customize Settings you first get an opportunity to rename your VM to something better.
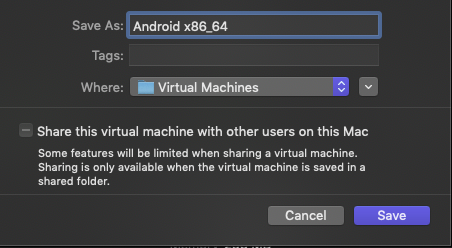
Give the VM a proper name
I figured to call the VM “Android x86_64”, but name it anything you like. Then press Save.
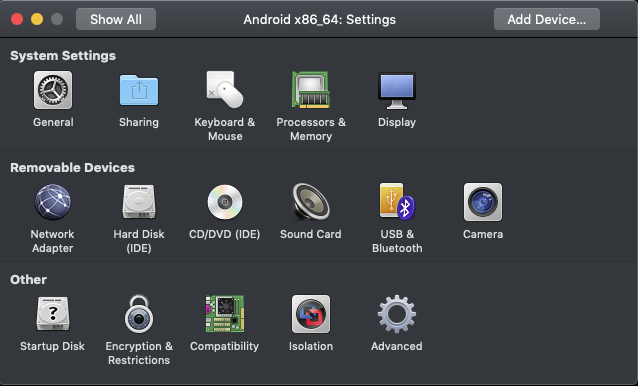
Adjust the default VM settings
Here we can change the default VM settings. Click on “Processors & Memory”
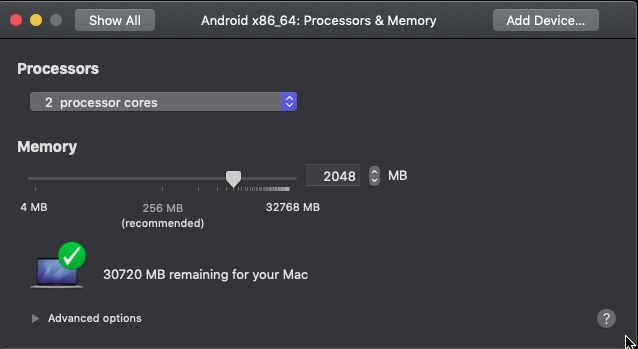
Change default vCPU’s and RAM
The default was 1 vCPU and 256MB of RAM. That’s really not sufficient, change to 2 vCPU’s and 2GB of RAM. More can be added later if it isn’t enough for your usage. No need to change any of the advanced options.
Click on “Show All” after making the changes.
That brings you back to the settings. Click on the “Display” icon to change the settings there.
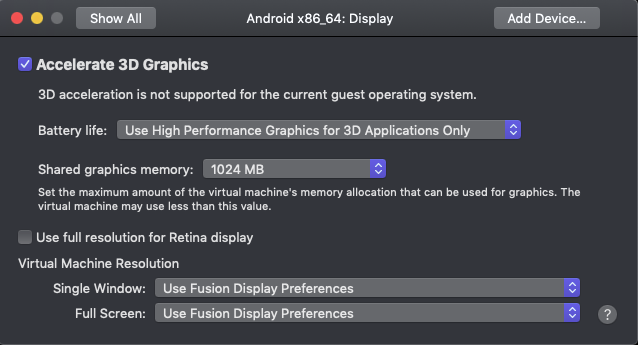
Enable 3D and assign more video RAM
Enable 3D and change the shared graphics memory to 1024 MB.
Android Installation Walk through
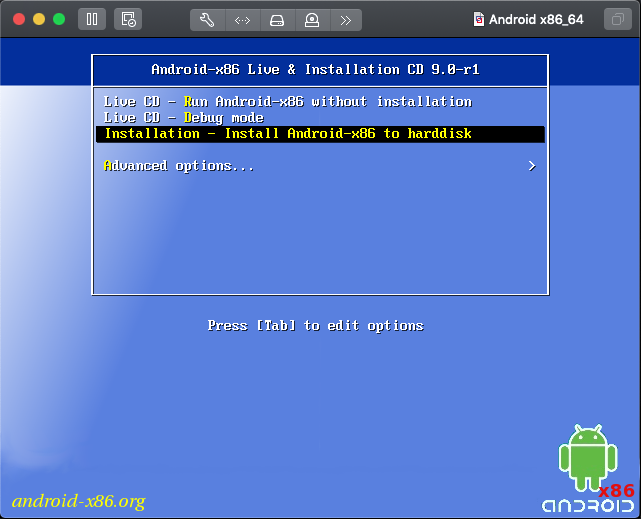
Click back on “Show All” and close the “Settings” dialog. You can now boot your VM. It should come up with the following screen.
Select “installation” in the boot menu
Select “installation” from the boot menu here as we are going to create it into a VM.
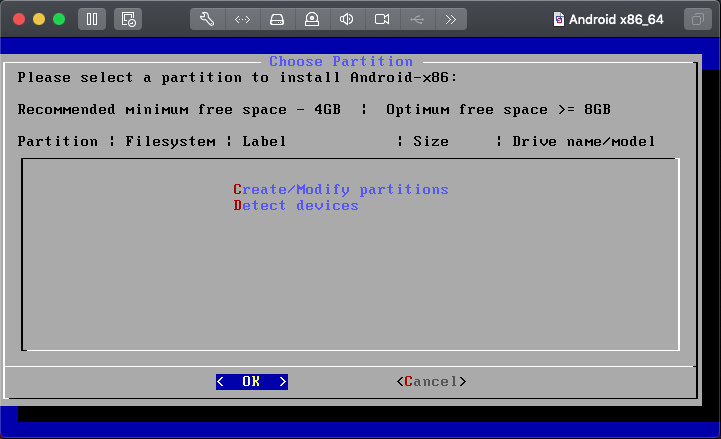
Create a new partition
Partitioning the virtual disk
We are going to create a new “All in one” partition, type “C” to select the “Create/Modify partitions” option. With the arrow keys you can navigate on the options. Press the “Return” key with the “OK” button highlighted like here.
Create MBR
We are not going to use GPT, but MBR instead. So select “No” like the default and press “Return” once more.
Create a new partition
Use the “Right Arrow” key to select “New” and press Return.
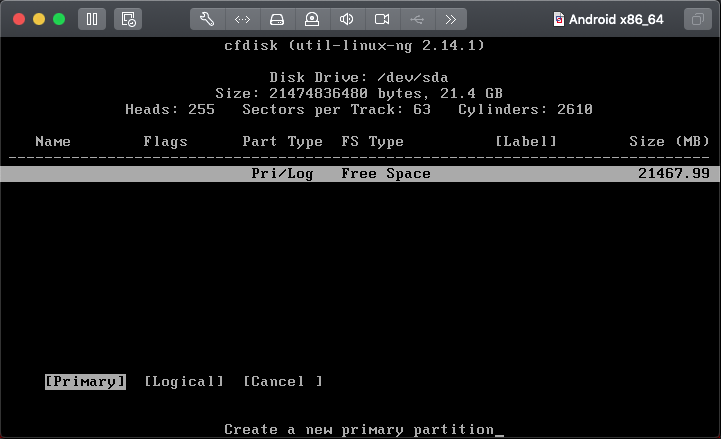
Create a Primary Partition
The partition wizard wants to know if you want to create a Primary or a Logical Partition. Choose the default (Primary) and press return. After that it asks how big that partition should be. It will default to the whole disk. Which is correct.
size: 21467.98
Press Return again.
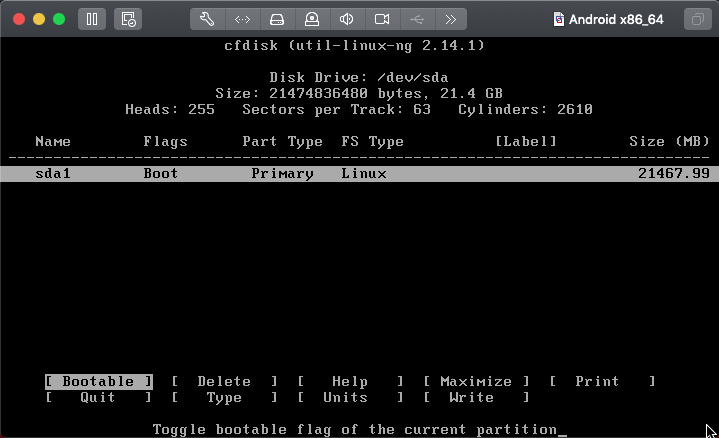
Make partition bootable
We need to make the partition bootable in order to be able to start up. So with “Bootable” selected as above press “return”. The “Boot” flag should show up, just as in the screenshot above. Arrow right a few times to go to “Write” Press “return”
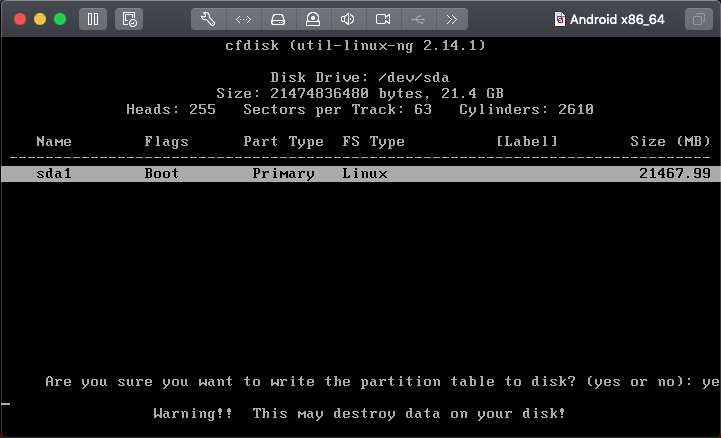
Write partition to disk
You are asked if you are sure as it is a potentially data destroying operation. This is a new virtual machine, so yes we are sure. Type “yes” -without typing the parentheses- and press return. As you can see in the above screenshot, the letter “s” fell off the screen. Don’t worry about that.
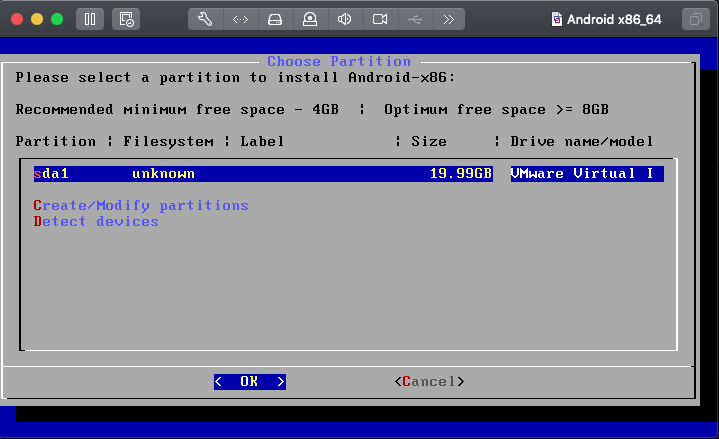
Select new partition
Once we have a partition, we can select it. Select “OK” and return once more.
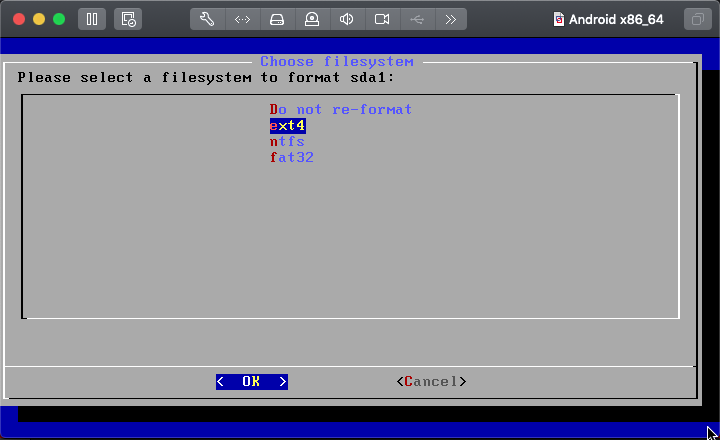
Create ext4 file system
Our partition needs a file system, select ext4 and continue.
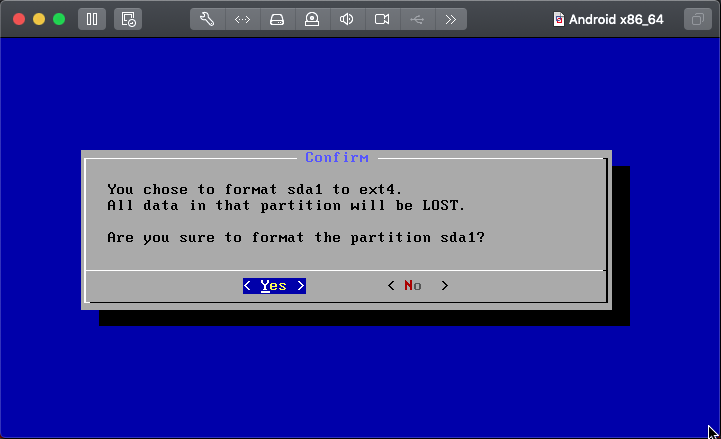
Write out ext4 file system
Yep, format as ext4, Select Yes and continue.
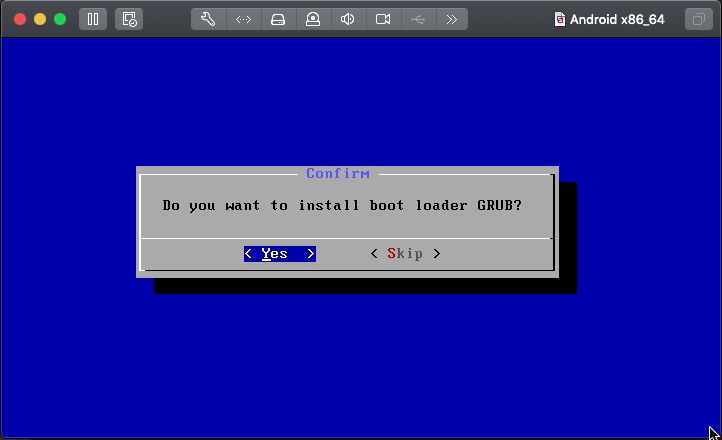
Install a boot loader
Install boot loader
Choose to install the GRUB boot loader. Select Yes and continue.
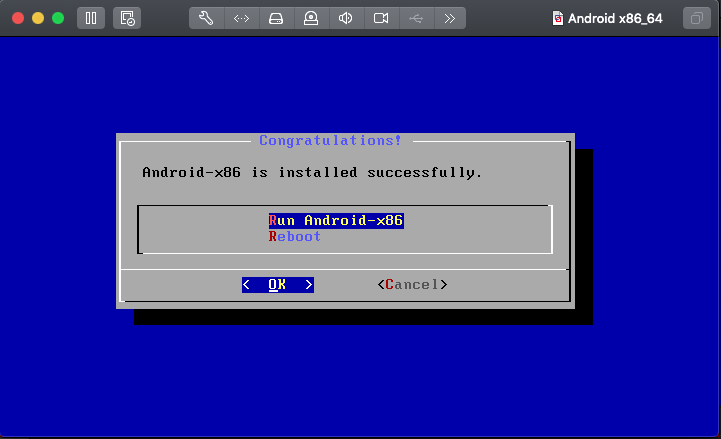
Copy the installation files to the VM
keep system read only
We do not need system read-write so keep it read only. Select “No” and continue. The installer will copy all the files to your virtual disk and once that completes, the following screen appears.
Android installed
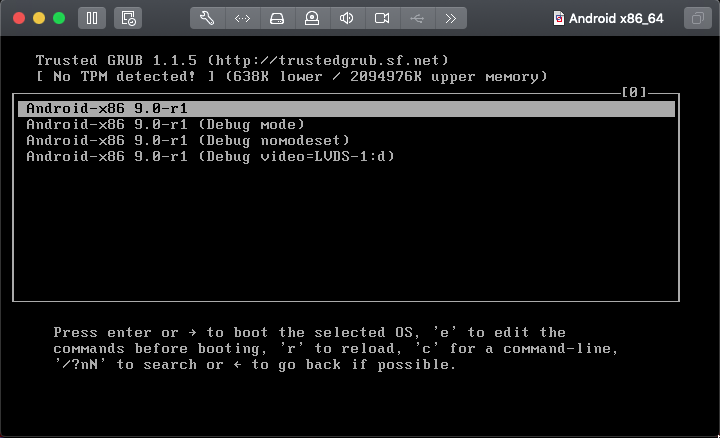
Fix the problems
You can try the “Run Android-x86”, but it won’t work. You’ll get a blinking cursor, so you might just save yourself the trouble of having to press reset in the toolbar and go straight for a “Reboot”.
Grub boot menu options
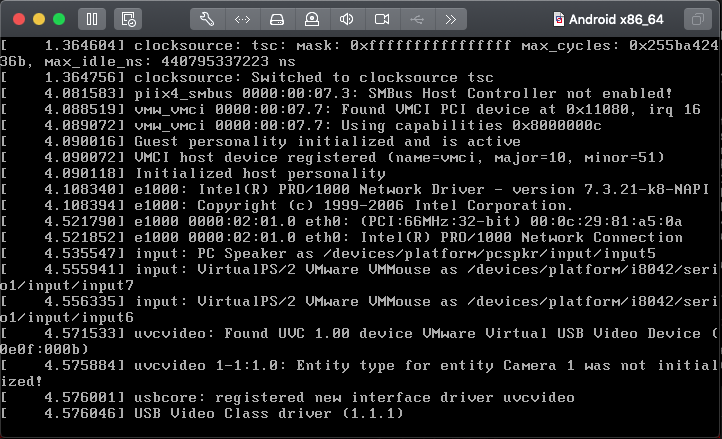
Android is now installed on your virtual disk. However trying the first options gives you a black screen and all the other “Debug” options give you a screen with text scrolling by that all stops at “USB video class driver”
Booting into debug
Not exactly great. But it can be fixed.
Adjust boot options
So reset the VM, get back to the “Grub options” screen from above. Select “debug mode” and press the letter “e”, the on line “kernel” press “e” again to edit.
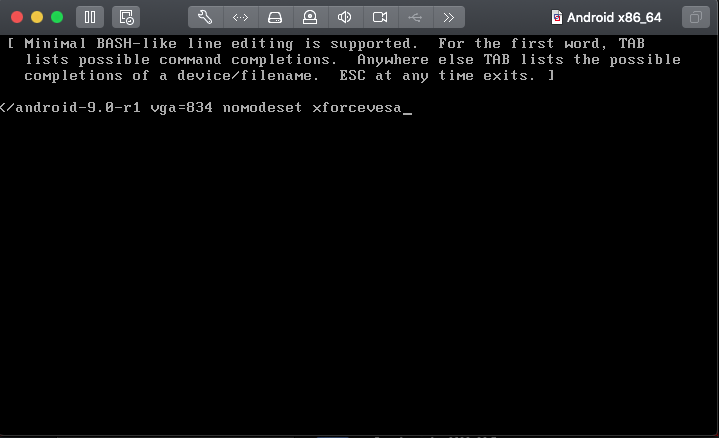
Edit grub kernel line
At the end of the line add “vga=834 nomodeset xforcevesa” like above. Press return to get back in the previous screen and press “b” to boot with the new changed kernel parameters.
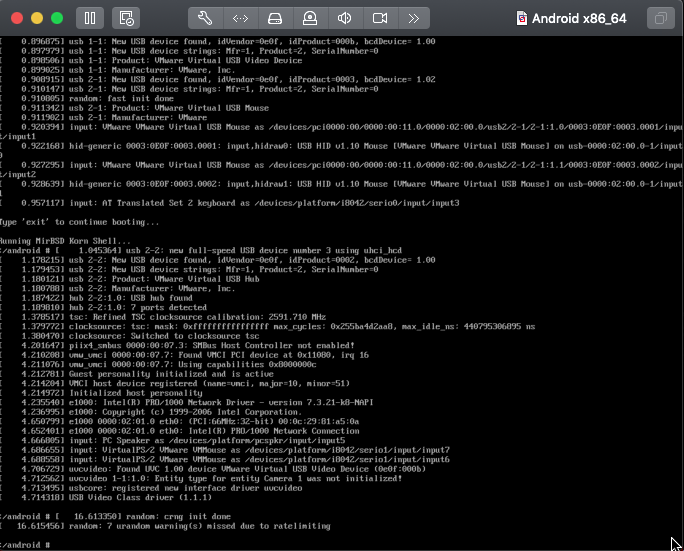
Booted into debug
Let it boot. Android might appear to hang at the end, but if you press “return” then you will get a prompt.
remount read-write, edit grub menu.lst
Remount the disk as read/write
At the prompt do the following
Now remount the partition so you can make changes: mount -o remount,rw /mnt Then edit the default menu file for grub in vi: vi /mnt/grub/menu.lst
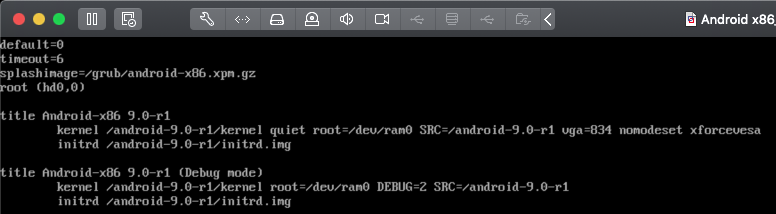
Edit boot option in vi
Use the cursor keys to navigate to the first line that has “kernel” at the front. Press “Shift+a” to move the cursor behind “/android-9.0-r1” then press space and add: vga=834 nomodeset xforcevesa at the end of the line. Save your changes in vi by pressing the Escape key, the type the letters :wq which should save your changes to the menu.lst file if all went well. Reboot the system: cd / reboot -f and the system should reboot into the graphical Android environment.
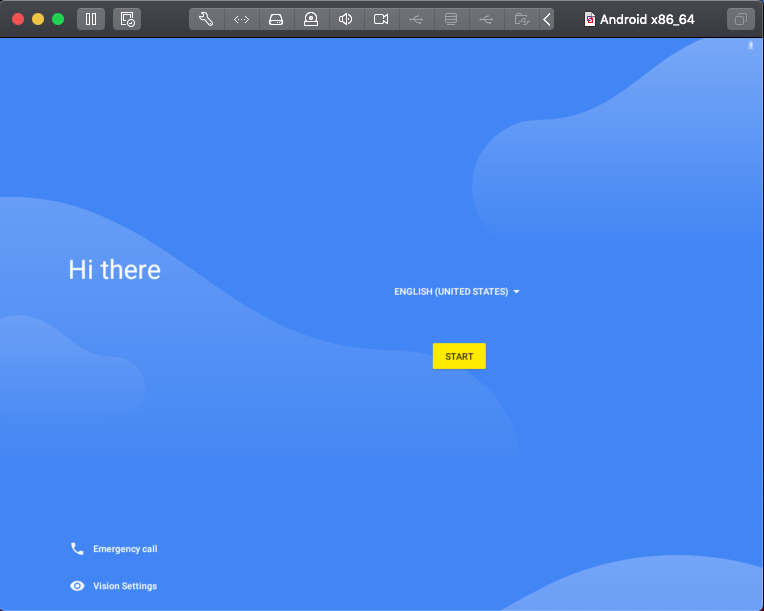
Android welcome screen
Success
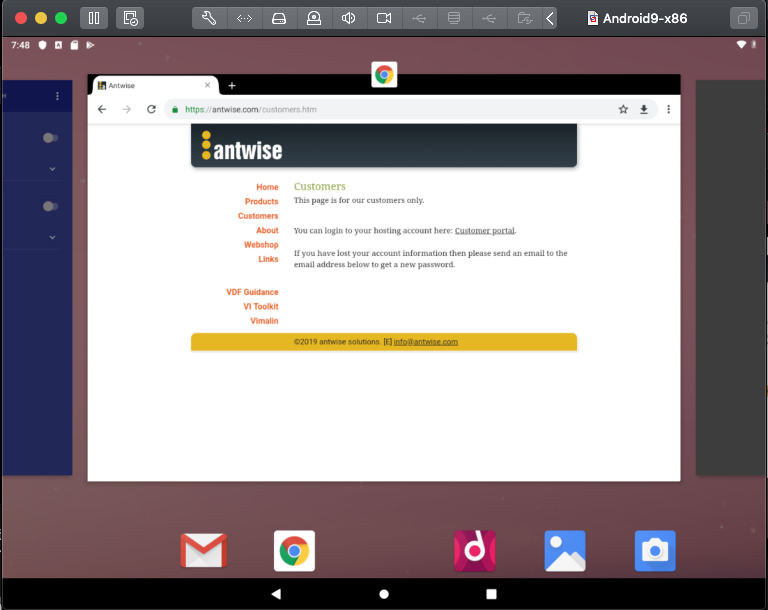
That’s it. From here it is a matter of following normal Android steps except for the network settings. For networking select “Virtual WiFi” and it should work OK.
Android 9 in a VM
All the steps above have been reported to work equally well in Workstation Professional 15.5.1
Now that you are here. Please check out our product “Vimalin“. It has been designed for making your life easier to get good backups of your VMs. We support VM’s running in VMware Fusion, VMware Workstation and VMware Player.
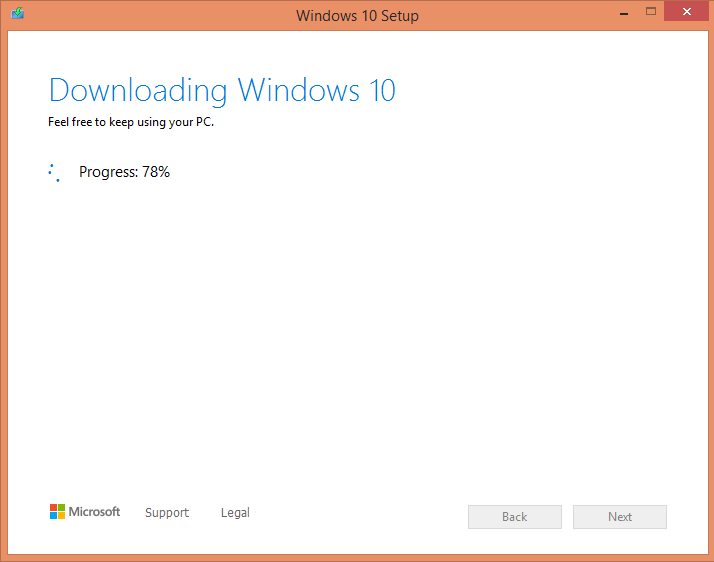
Now might be the right time to update to Windows 10 if you have a virtual machine running Windows 7. You don’t really want to keep on running with a VM that is no longer receiving Windows Updates.
You would see a similar error if you happen to use a Buslogic scsi adapter. Neither of those adapters have drivers for Windows 10 and as such the update gets stuck in a continuous loop.
Luckily though we are running a VM and changing hardware is therefor relatively easy and comes at a minimum cost (it is free!) But, you can’t just change the adapter as then you will end up with problems booting. There is however an easy way around that issue.
So cancel the upgrade and follow these steps. The screenshots below are for Windows 8, but it will also work for Windows 7. This article is written for VMware Fusion, but the same trick also works for VMware Workstation Professional and VMware Workstation Player.
Prerequisites:
Make sure your Windows is activated,
that the virtual hardware is up-to-date and
that VMware Tools is installed and the most recent version.
Step 1: Shut down your VM and make a backup
You can make a backup by closing VMware Fusion (or VMware Workstation) and make a copy of the complete VM to an external disk.
Step 2: Add the LSI SCSI SAS controller to the VM.
With the VM shut down and the VM window closed, go to Virtual Machine Library in VMware Fusion. Then select the VM, use right click (Ctrl+click) and hold down the option key. In the context menu, the option “Show in Finder” will change into “Open Config File in Editor”
Hold down the option key to edit the config file
In TextEdit, make sure you do not have smart quotes enabled. (File menu -> Preferences, the checkbox should not be ticked)
With all that out of the way, now look for the following bit of text in your vmx file. Please be aware that the lines do not have to be in this order, they can be anywhere in the .vmx file.
If you have a buslogic scsi adapter you will have this snippet:
We need to be able to use the LSI Logic SAS scsi driver. We cannot change that here now as Windows will not be able to boot. So instead we are going to let Windows load the new driver for us.
Note that instead of scsi0 it now says scsi1. This is important!
We are adding a new LSI SAS adapter in addition of the scsi adapter we already had.
Now save the file and exit TextEdit.
Step 3: Load the drivers for the new scsi controller.
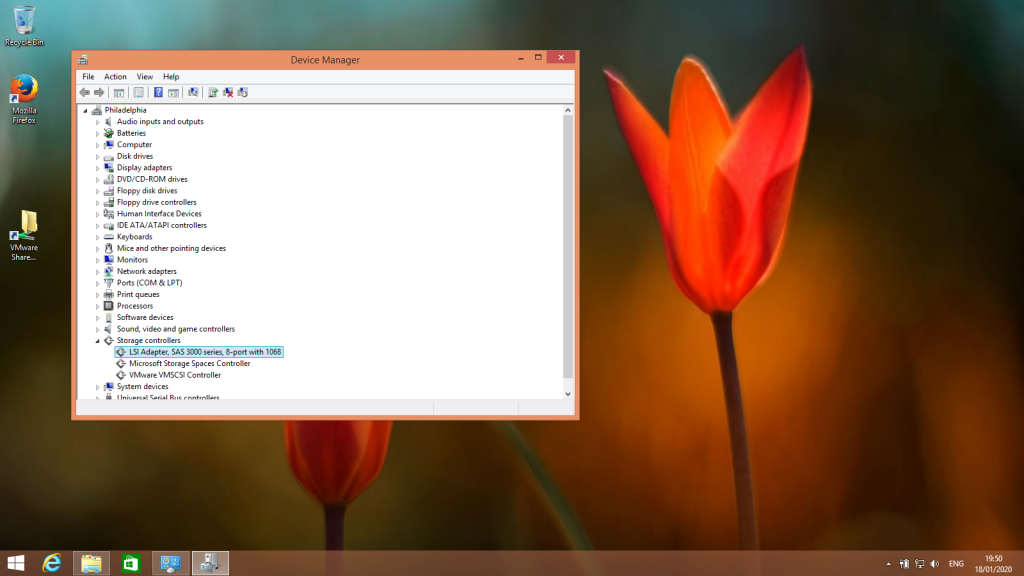
Boot your VM. If you followed the directions carefully, then the VM should still boot without any issues. Log in and verify that we have indeed loaded a new SCSI adapter. (Start menu -> right click -> Device Manager)
LSI SAS Adapter
That was the tricky part.
Step 4: Remove the old scsi adapter and switch over to use the new one
Now shut down your VM again and go back to editing the .vmx file. (use our earlier steps).
Locate the lines for the old parallel LSI Logic or buslogic adapter and remove those lines. This will remove the adapter that is incompatible with Windows 10.
Then change the lines we added from scsi adapter 1 to scsi adapter 0.
You should now be able to boot your VM with a new LSI SAS controller.
A scsi controller that is compatible with Windows 10.
Beware that changing the scsi controller might trigger the Windows Activation logic. Adding a controller and swapping them appears to be less of an issue. So if you trip up the activation Gods then that is my suggestion to try next.
Another problem you might bump into is:
“VMware SVGA 3D is not compatible with Windows 10.”
Normally that is just a warning with a button next to it that you can use to tell the installer to ignore this warning. After ignoring that you should be able to proceed. If there’s no “ignore this button” then have a look at the following KB article: https://kb.vmware.com/s/article/2126929
After you completed your upgrade to Windows 10 do not forget to change the guest OS type in VMware Fusion / Workstation from “Windows 7” to “Windows 10” and then re-install VMware Tools.
Now that you are here. Please check out our product “Vimalin“. It has been designed for making your life easier to get good backups of your VMs. We support VM’s running in VMware Fusion, VMware Workstation and VMware Player.